
I wish this ornament was a joke. So much of me wishes that this would be the ultimate April Fool’s Day where we didn’t know the trouble and tribulation that 2020 brought to our homes. Sigh… but 2020 has been a dumpster fire. Right? That’s why I’m going to show you how to make the perfect Christmas ornament for 2020 using polymer clay. So without further ado, I present to you the only ornament you will need this year to hang on a tree wrapped in toilet paper and dotted with hand sanitizer bottles….
The Dumpster Fire of 2020 Christmas Ornament.
You can make this ornament. If you can play with Playdoh, you can do it. Plus at the bottom I’m going to give you a PDF template to print to make it that much easier.
This post contains affiliate links
What Will You Need to Make this Polymer Clay Ornament?
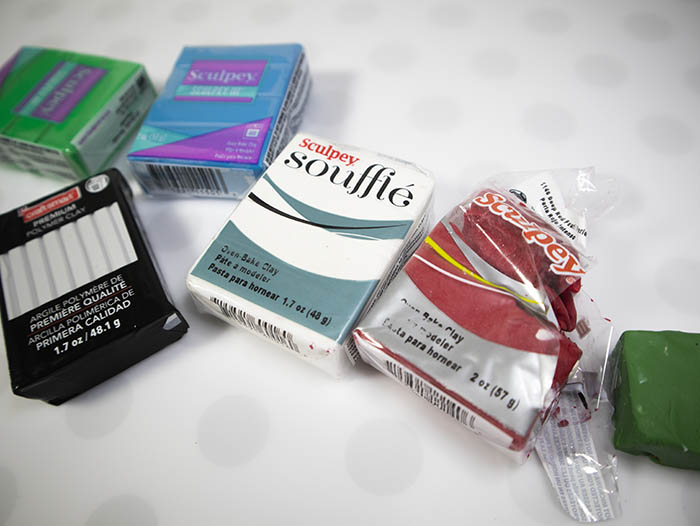
You’ll need polymer clay. Because of the popularity of polymer clay earrings this year, I had some trouble finding the brands of polymer clay that I usually choose to use. I had to get a few brands that I don’t usually enjoy working with. Here’s a tip: You can mix clay brands. So I mixed several of the brands I didn’t like with a brand I did like to make it easier to work with. If you are having trouble working with a clay, add a little of a softer easier to use one and just knead away.
I used blue, white, red, orange, yellow, and a small amount of green for holly leaves.
Remember to knead the clay before you use it to get it soft and pliable.
You will also need:
- an acrylic rolling pin or Crayola marker if you kids have walked off with your acrylic rolling pin (also not a joke)
- a simple tool kit for working with polymer clay
- parchment paper or a small flexible cutting board because polymer clay can stain work surfaces
- thin bead stringing wire
- black paint
- an oven and baking sheet
- print out of the Dumpster Fire Ornament Template PDF
- polymer clay glaze
You can shop for this entire list on Amazon.

To Make The Ornament:
Start by rolling out white polymer clay about 1/4 of an inch thick. This will be the base of your ornament. It’s what you will attach the blue dumpster and fire part to. If you’re using the template, it’s the first image at the very top.
Once you have your white clay rolled out, place the template on top of the clay lightly and trace around the edge of the image that has the dumster shape and fire shape joined together to leave an impression of the shape. You don’t need to push through the paper. Remove the paper and you will see the outline where you need to use a sharp knife tool to cut out the shape.
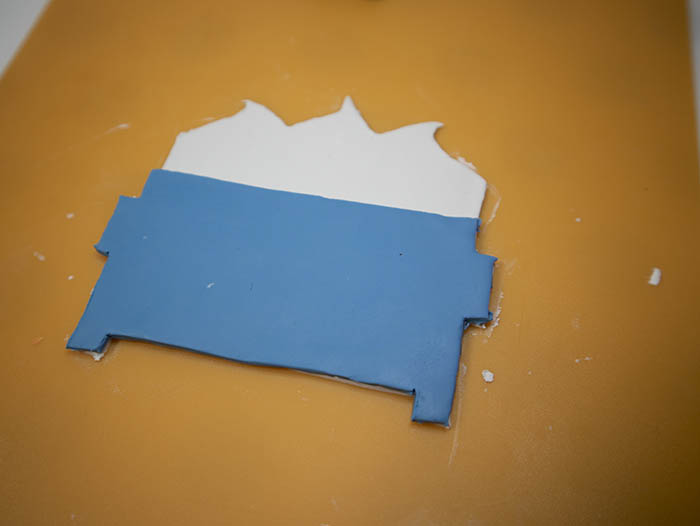
Do the same with the blue polymer clay to cut out the dumpster and then put it gently on top of the white, lining it up.
If there’s any mistakes or rough edges, use a straight edge to straighten the edges or cut off any edges that stick out. I use a metal bench scraper from the Dollar store to help push any wavy edges back straight.
Now it’s time to start on the polymer clay for the fire.

I had photos to show you this process but because it’s 2020, I accidently deleted them. It’s very easy though and actually a lot of fun.
You want to knead your red, orange and yellow clay and then roll them individually into thin sticks. I used about 1/4 of the brick of clay for the red part, about half of that amount for the orange and then just a small ball of yellow. Switch up the colors and play as much as you want.
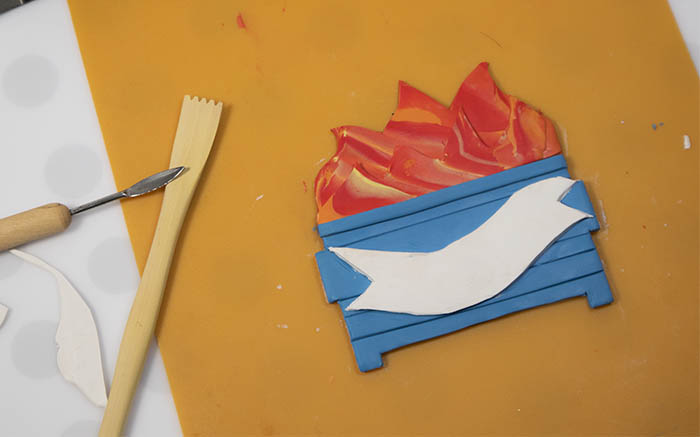
I rolled the three colors into sticks about 3 – 4″ long. Then I stacked them on top of each other and rolled them together in my hand. As it got longer, I would pull it and fold it ove so I could roll the two sides together. Keep doing this process until it has a lot of great marbeling. Once you’re ready, roll it out and it should look similar to the image above. Use this clay to cut out the flames and put them on the ornament.

I did two layers of flames. You can do two or one, it’s up to you.
Before you press the flames all the way down onto the white template, cut about 6″ of the bead stringing wire and press it down in-between the white later and the flame layer to make a hanger for your ornament.
At this point, you have a basic ornament that you can use as is… but let’s add a few details.
I used a metal bench scraper from the dollar tree to make horizontal marks across the blue part of the ornament. This just helps give the dumpster a little dimention. I also cut a thin band of blue polymer clay and attached it at the top of the dumpster part to help hid the rough edge where the flames and blue dumpster met.

Using the Dumpster Fire template, I cut out a white banner and attached with with a little pressure to the dumpster. I added holly and berries to the corner of the banner before using stamps to impress the “2020” image into the banner. If you don’t have number stamps, you could use vinyl once the ornament is finished or bake the ornament and then paint on the 2020 numbers.

Once I had 2020 pressed into the clay, I used black paint to fill in the numbers but I did a sloppy job.. on purpose. Almost immediately I took a damp paper towel and wiped away any paint that had gotten on the top edge.
Now, dumpsters are smoky, dirty places so we need to rough up the ornament a little bit. I used a dry paintbrush with barely any black paint on it to add a few dirty accents. Then I rubbed the black paint in with a barely damp paper towel.
Bake according to package instructions for the clay that you used. Do not overbake.
And when you pull it out of the oven, you’ll get excited about how great and funny it turned out. Hopefully for a few minutes, this ornament will help you find your laugh and your smile.
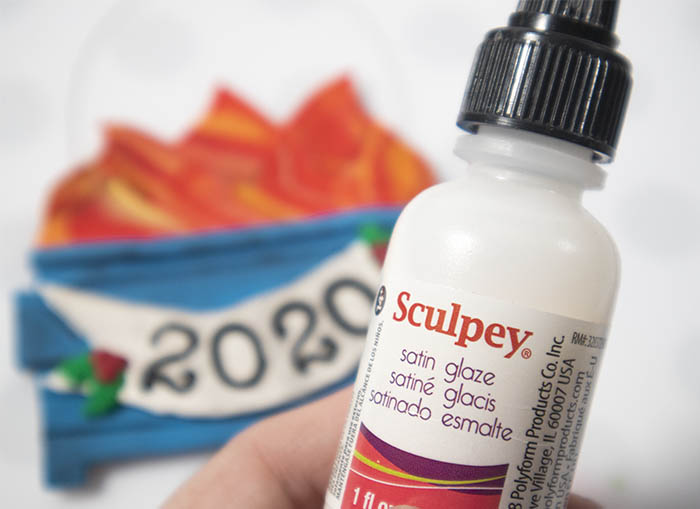
Finally, after baking the ornament, I added a small amount of Sculpey Satin Glaze and used a paint brush to spread a thin layer over the ornament. Let dry according to package instructions.
Merry Christmas 2020, you have been one heck of a hot mess inside of a dumpster fire.

As always, the images on this blog and this idea is copyright of ClumsyCrafter. You may not use this idea or resell it for commercial purposes. If you are interested in using it for commercial purposes, please contact me to discuss licensing.
I hope you enjoy this idea and make a hilarious ornament for your family to cherish and remember this past year.


